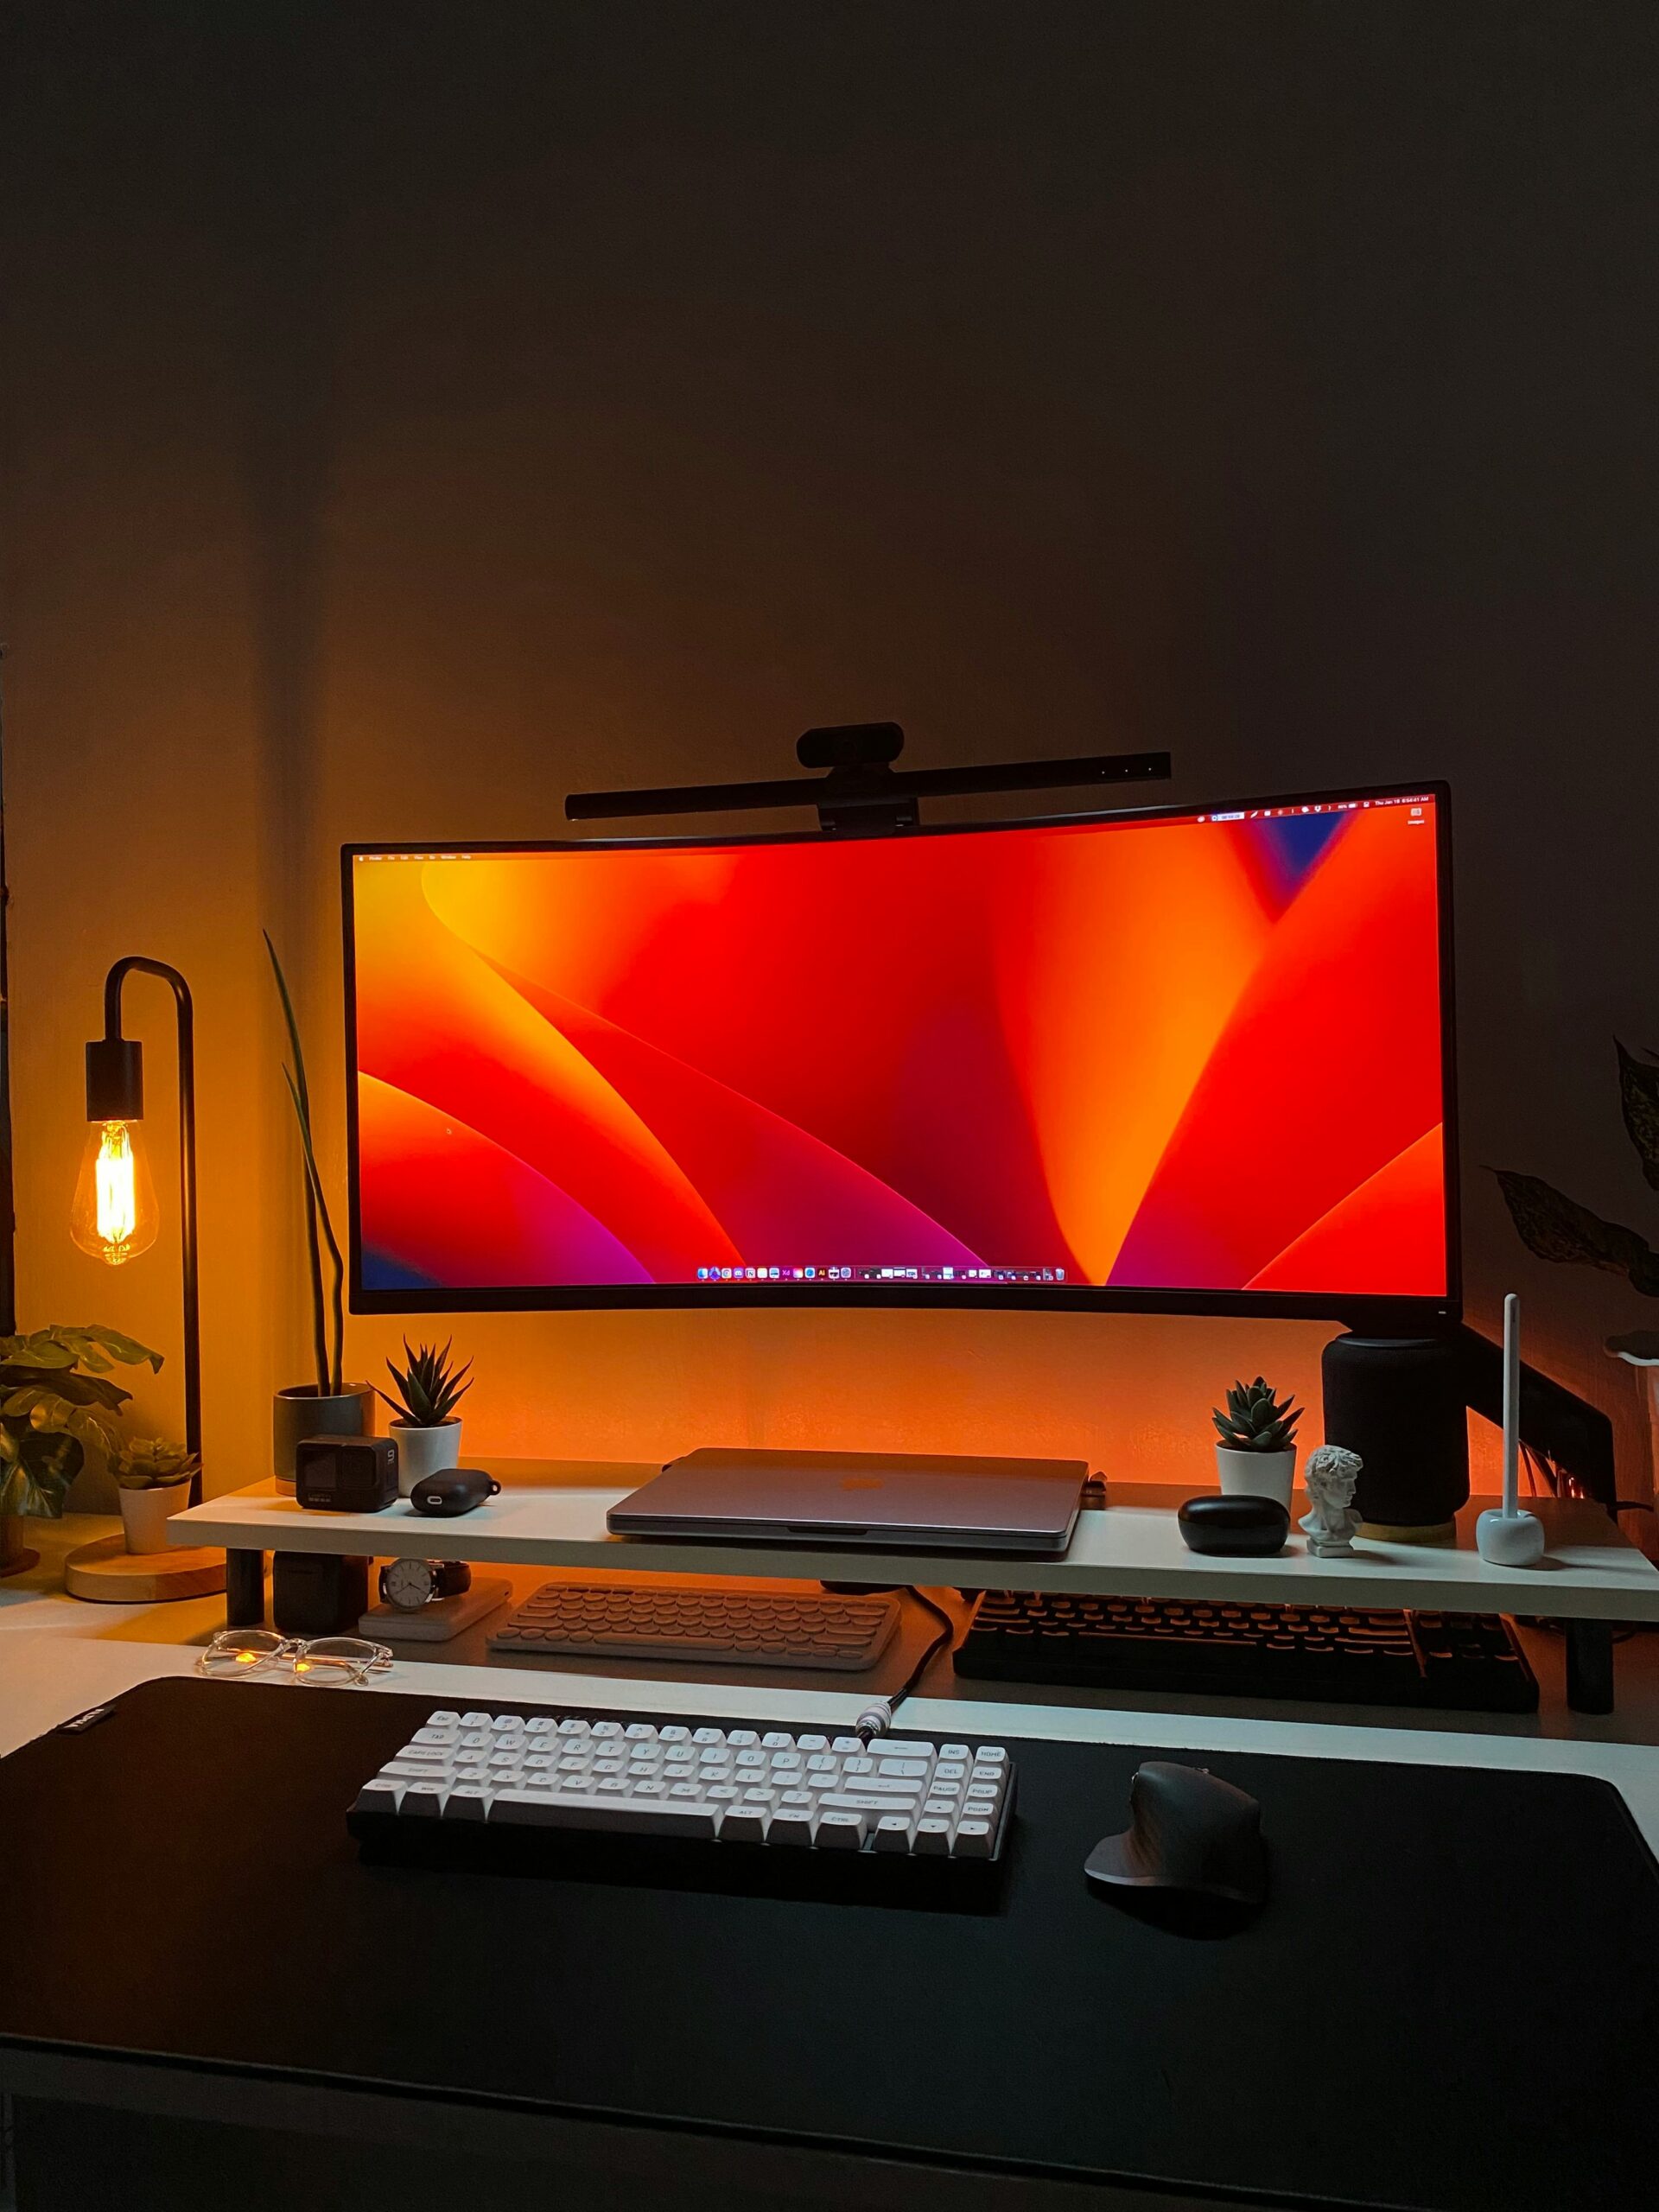
Nothing ruins the aesthetic of a modern living room faster than “Cable Spaghetti.”
You buy a sleek 4K TV, a minimalist media unit, and a soundbar. But then you plug them in. Suddenly, you have black HDMI cables dangling down your white wall, a router blinking aggressively in the corner, and a power strip that looks like a snake’s nest.
For homeowners, the solution is “Chasing.” They hire an electrician to cut a channel into the brickwork, bury the cables inside the wall, and plaster over it.
For the 4.6 million renters in the UK, this is strictly forbidden. It counts as structural damage and is a guaranteed way to lose your entire deposit.
But you don’t have to live with the mess.
There are “Overlay Solutions” which are professional-grade trunking, clips, and sleeves that hide wires on top of the wall rather than inside it. If you choose the right ones (and remove them correctly), they are invisible to the eye and leave zero trace when you move out.
Comparison: The Renter’s Cable Toolkit
| Solution | D-Line Trunking | Command Cord Bundlers | Neoprene Zip Sleeves | D-Line Cable Box |
| Best For | Wall Mounted TVs | Skirting Board Runs | Desk/PC Chaos | Power Strip Hiding |
| Installation | Adhesive (Strong) | Adhesive (Removable) | Zip/Velcro | Floor Standing |
| Paintable? | ✅ Yes | ❌ No | ❌ No | ❌ No |
| Renter Rating | ⭐⭐⭐⭐ | ⭐⭐⭐⭐⭐ | ⭐⭐⭐⭐⭐ | ⭐⭐⭐⭐⭐ |
The 3 Rules of Renter Cable Management
Before you stick anything to a wall, you need to understand the physics of “Rental Paint.” Most landlords use cheap, matte emulsion. It is porous and fragile.
- Gravity is the Enemy: Do not try to stick a heavy 6-way extension lead to the wall using tape. It will fall, and it will take a chunk of plaster with it. Keep heavy items on the floor.
- Heat is the Key: Never rip adhesive off a cold wall. You must heat it first (we will explain the “Hairdryer Trick” below).
- Paintable is Professional: White plastic trunking on a Magnolia wall looks cheap. Buy “Paintable” trunking and spend £3 on a tester pot of paint to match your wall. It makes the cables vanish.
1. The “Pro” Look: D-Line Micro/Mini Trunking
If you have a TV mounted on the wall (or standing on a unit) and cables dropping down, D-Line is the gold standard in the UK. Unlike cheap square trunking used in offices, D-Line has a “half-round” profile. This curve blends into the wall much better than a sharp box shape.
Micro vs. Mini: Which Size?
- Micro (16x8mm): The tiny one. Fits 1 or 2 thin cables (e.g., a Speaker wire or a Fibre optic cable).
- Mini (30x15mm): The standard one. Fits 3 or 4 chunky cables (e.g., HDMI + Power + Aerial + Ethernet). Most people need this one.
Why It’s Renter Friendly
It comes with a self-adhesive backing that is incredibly strong. You peel the red tape, use a spirit level to get it straight, and stick it to the wall.
Crucially, the surface is textured to accept paint. If you paint it the same colour as your wall, it visually disappears.
Pros:
- The cleanest, most “built-in” look possible without drilling.
- Hinged lid makes it easy to add/remove cables later.
- Paintable surface takes emulsion well.
Cons:
- The Adhesive Risk: The backing is very sticky. You must follow our removal guide below or you will damage the paint.
2. The “Zero Risk” Option: Command Cord Bundlers
If you are terrified of damaging the paint, use Command products. They use a patented “Stretch Release” technology. When you want to remove them, you pull the tab downwards, the foam stretches, and the bond breaks cleanly without touching the paint.
Best Use Case: Skirting Boards
The Command Cord Bundlers are perfect for routing a long Ethernet cable from your router in the hallway to your gaming PC in the bedroom. You stick them along the top of the skirting board every 30cm.
Pros:
- 100% Deposit Safe: If you pull the tab correctly, it is impossible to damage the wall.
- Strong: Can hold thicker cables than standard clips.
Cons:
Visible: They are clear/white plastic chunks. They don’t blend in as seamlessly as trunking.
3. The Desk Tidy: Neoprene Cable Sleeves
If the mess is behind your TV stand or computer desk, you don’t need to attach anything to the wall. You just need to bundle the chaos so it doesn’t look like a spider’s web.
Neoprene Sleeves are zip-up “jackets” for your cables. You grab the fistful of wires behind your TV, wrap the sleeve around them, and zip it up.
Why It’s Better than Spiral Wrap
Old-school “Spiral Wrap” (hard plastic) takes hours to twist on. Neoprene sleeves zip up in 2 seconds. Plus, if you need a cable to exit halfway down (e.g., to plug into a console), you can just cut a tiny slit in the soft fabric with scissors.
Pros:
- Zero Installation: No sticking, no drilling.
- Reusable: Take them with you to your next flat.
- Opaque: Hides the ugly colours of different wires (black/white/grey) inside a uniform sleeve.
Cons:
- Only tidies the cables; doesn’t hide them from view if they are out in the open.
4. The Floor Solution: D-Line Cable Tidy Box
The ugliest part of any setup is the “Power Strip” (Extension Lead). It sits on the floor gathering dust, with 4 clunky plugs sticking out of it.
The D-Line Cable Tidy Box is a simple ABS plastic box designed to swallow your extension lead. You drop the messy power strip inside, route the cables out of the slots at the back, and click the lid shut.
Pros:
- Safety: Stops pets (or toddlers) chewing on live plugs.
- Cleaning: Makes it much easier to hoover the floor without getting tangled.
- Aesthetics: Looks like a sleek speaker or storage bin rather than a nest of wires.
Cons:
- It’s a fairly large box on your floor (check dimensions if fitting behind a sofa).
Installation Guide: How to Remove Adhesive (Without Losing Your Deposit)
This is the most important section of this article. The number one reason tenants lose money on “alterations” is peeling paint when removing sticky strips.
Here is the secret “Heat & Saw” method used by professionals.
Step 1: Apply Heat
Do not just pull the trunking. The glue is cold and brittle; it will snap the paint.
Take a standard hair dryer. Set it to Hot / High. Blast the trunking for 60 seconds.
- Why: This softens the adhesive, turning it from a solid into a gooey gel.
Step 2: The “Dental Floss” Saw
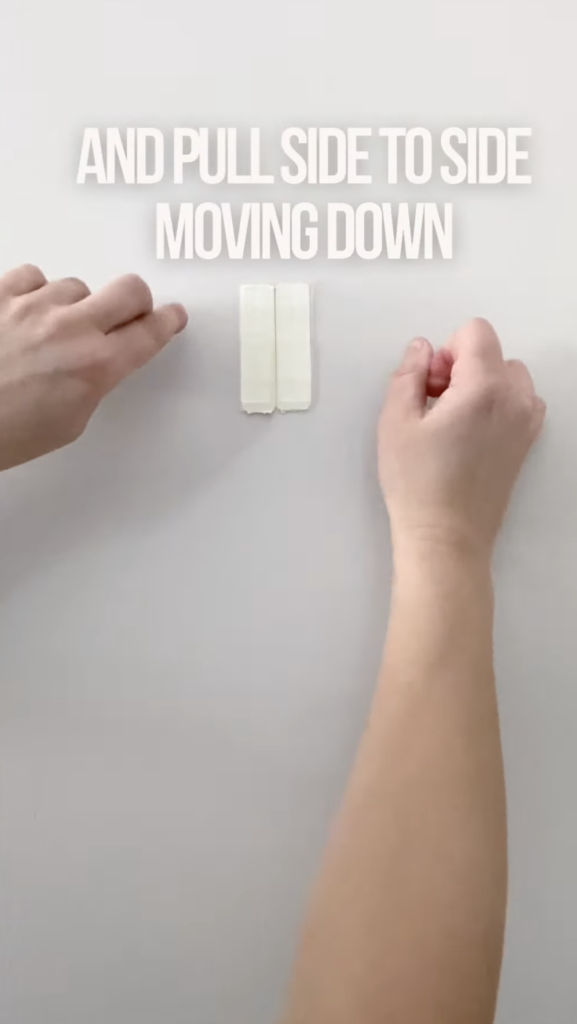
Gently “saw” back and forth, slicing through the warm foam tape. Work your way down the wall.
Step 3: Roll the Residue
Once the trunking is off, you will have some sticky residue left on the wall.
Do not scrape it. Use your thumb to firmly “roll” the glue into a ball. It should lift off the paint cleanly. If it’s stubborn, apply a tiny amount of WD-40 to a cloth and dab it (test on a hidden area first).
Real-World Reality: User Tips
We checked the DIYUK subreddit to see common mistakes people make with cable management.
1. “The Wonky Trunking”
User Report: “I stuck the D-Line up by eye. It looked straight, but when I sat on the sofa, it was annoyingly wonky. I tried to pull it off and ripped the wall.”
💡 The Smart Tenant Fix:
Once the tape touches the wall, it is stuck. You don’t get a second chance.
Our Advice: Use a spirit level (or a free Spirit Level app on your phone). Draw a faint pencil line on the wall before you peel the red tape backing. Align the trunking to the pencil line.
2. “The Overfilled Mini”
User Report: “I bought the Micro size and couldn’t snap the lid shut because my HDMI cables were too thick.”
💡 The Smart Tenant Fix:
Cables are thicker than you think, especially high-quality braided HDMI or Power cables.
Our Advice: Always buy the “Mini” (30x15mm) size, not the Micro, unless you are 100% sure you only have one wire. It is better to have extra space inside than a lid that pops open every week.
Verdict: Which Method Should You Use?
- For Wall-Mounted TVs: Use D-Line Mini Trunking. It’s the only way to get that “floating TV” look without chasing the wall. Paint it to match your room.
- For Computer Desks: Use Neoprene Zip Sleeves. It turns 10 messy wires into one neat “snake.”
- For Extension Leads: Use the D-Line Cable Box. It hides the ugly plug sockets and makes cleaning easier.
- For Renters terrified of Paint Damage: Use Command Cord Bundlers. They are the only option that guarantees damage-free removal (if you pull the tab correctly).
Frequently Asked Questions
Can I stick D-Line trunking to wallpaper?
We strongly advise against it. The adhesive is stronger than the wallpaper paste. When you try to remove the trunking, it will almost certainly rip the wallpaper off the wall. If you have wallpaper, use the Cable Box (floor solution) or run cables along the skirting board using Command Clips instead.
Is it illegal to drill holes for cables in a rental?
It is not “illegal” (you won’t go to jail), but it is a breach of contract. Almost all Assured Shorthold Tenancy (AST) agreements forbid “alterations to the fabric of the building.” Drilling holes allows the landlord to deduct the cost of filling and repainting from your deposit.
Can I paint the neoprene sleeves?
No. The fabric material absorbs paint and looks terrible. If you need to hide cables against a specific wall colour, use the hard plastic D-Line Trunking instead, as that is designed to be sanded and painted.
How do I hide my Wi-Fi router?
Be careful. Hiding a router inside a TV cabinet or behind a book blocks the signal. A better option is to use a “Router Camouflage Box“(available on Amazon) which looks like a hollow book or storage bin but uses materials that allow Wi-Fi signals to pass through.